The mobile platform provides for a host of APIs (Application Programming Interface) and Post Notifications that can be used to create contacts, send messages, generate lists, and manage select account features and settings.
TABLE OF CONTENTS
v1 APIs vs v2 APIs
Current APIs may be available as v1 or v2. The main difference between is that v2 APIs require an authentication Token. Click the prompt at the top of the page to view the v2 APIs.

v1 APIs do not require a Token. Instead, these legacy APIs may require either a USER GUID, UN & PASSWORD, or combination of these variables.
Note - Overtime, all v1 APIs will be converted to v2 and eventually depreciated.
Access API Menu, follow the steps below:
Step 1. Click MESSAGING from the main menu
Step 2. Click GATEWAY API.
Create a Token
To use v2 APIs, a token must be created. Follow the steps below to create a Token:
Step 1. Click the v2 API prompt at the top of the page then click the Token Console Tab.

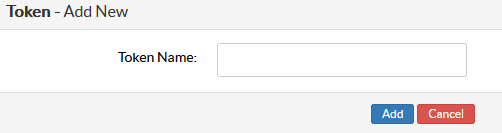
Step 2. Click the ADD NEW TOKEN button, then enter a name for the token and click ADD.

Post Notifications
Post Notifications are data sent to an external source when selected activity occurs within an account. This includes but is not limited to when a new contact is added or updated, an incoming reply is received, a coupon is redeemed, a check-in is recorded on the kiosk.

These notices can be delivered as a POST, GET or EMAIL, with data written as TEXT, JSON, XML, URL ENCODING or a TEMPLATE.
Follow the steps below to add and manage Post Notifications:
Step 1. From the Gateway API Menu, click the POST NOTIFICATIONS button in the upper right-hand corner or the page, or click the Post Notifications Tab from the v2 API section.
Step 2. Click the Create a New Event Prompt at the top of the page, then use the drop down menu provided to see the list of available Post Notifications.
Step 3. Use the available settings to configure the post to enable and send to the desired end point, then click the SAVE CHANGES button. This will produce a list of the variables the post will include, which can be renamed or deselected accordingly.